Tofu Bean Sprout Soup

With the cool weather comes the need for baking and soup making (like my little rhyme there?). As you know I have been trying to retrain myself to eat intuitively. It’s kind of a slow and steady process but I’m happy to say I’ve lost 13 pounds! Even with these improvements some days I just feel ravenous and find myself wanting to eat a massive quantity of everything! In order to allow myself to be able to eat more and hopefully feel full I made myself a big pot of bean sprout soup today. As weird as it sounds… I absolutely love this stuff. I especially craved it when I was pregnant. It’s low in calories and it fills you up fast. A little back story…

A few years ago my mom came across Asian dramas (with an emphasis on the Korean dramas) and a whole new world opened up to us. Asian romances and Asian food! Our love of the Korean culture even pushed my mom to sign up for a Korean exchange student who lived with us for nearly a year. We had so much fun learning her culture and tasting the new foods she shared with us. Bean sprout soup was definitely a “love at first bite” for me.

It’s so yummy and a nice addition is tofu and rice. This soup is gluten free as well as paleo if you forego the rice.

OLYMPUS DIGITAL CAMERA


Tofu Bean Sprout Soup
(Slightly Adapted from Bap Story)

6 cups water
200g bean sprouts (about 2 cups)
6 dried anchovies (or 1-1/2 tsp. dashi)
1 piece of dried kelp
2 inch slice of daikon radish
7 ounces firm tofu
2 teaspoons salt
1 teaspoon Korean red chili powder
2 tablespoons chopped green onions

Add water, anchovies (or dashi), kelp and daikon radish to pan. Bring to a boil, lower heat to medium and cook for 4-5 minutes.

Remove kelp and anchovies. Add bean sprouts and tofu. Cover pan with lid and increase heat. Bring to a boil for about 2 minutes.

Then add salt, Korean red chili powder and green onion. Let simmer for a few minutes and serve. To make it a little more filling you can add a 1/2 cup rice to your bowl and its delicious. If you are Paleo then leave out the rice and its just as tasty!

OLYMPUS DIGITAL CAMERA


OLYMPUS DIGITAL CAMERA

OLYMPUS DIGITAL CAMERA OLYMPUS DIGITAL CAMERA


Paleo Roasted Cauliflower Cous Cous/ Rice

It was family picture day and it was an exhausting week trying to figure out what everyone was going to wear so we all matched but not too much! Thankfully our 2 little munchkins were happy and cooperated pretty well this morning. So glad they are done for the season though!

On top of this success I am also excited to share this new recipe with you. Manly has taken up hunting this year and his friend came up to join him in scouting some possible hunting areas… this friend has recently turned to the paleo diet. I don’t have an interest in going completely paleo but I am always interested in trying new things. I decided to make a meal and venture into the unknown… by making cauliflower rice! Scary!

I made lemon chicken and roasted broccoli as well. I wasn’t too impressed with the cauliflower rice and opted to head out for some me time while the guys ate dinner without me… so I didn’t have to awkwardly receive compliments on something that didn’t turn out well. I don’t like feeding things to people I myself do not enjoy. Anyways… after I returned and the friend was gone, my brother suggested roasting the leftovers. This little addition brought my cauliflower rice to a whole new level! It actually tasted a lot like cous cous so I’m calling it both.

Roasted Cauliflower Cous Cous Rice

Roasted Cauliflower Cous Cous Rice

1 head of cauliflower
1/4 cup onion
1/4 red bell pepper
1 small jalapeno pepper
1 garlic clove
3 eggs, whisked
olive oil
salt and pepper

Instructions:

Preheat oven to 400 degrees.

1. Cut up the head of cauliflower into small chunks and put them through the food processor until they are rice like.

2. Food process the onion and garlic together. Squeeze out excess liquid. Set aside.

3. Food process pepper and jalapeno together. Squeeze out excess liquid. Set aside.

4. Heat a large saute pan on medium high. Add 1 tbs. of olive oil and saute onion/ garlic mixture until soft and clear. Add in the peppers and continue to cook.

5. While veggies are cooking use a small saute pan to prepare the eggs. Heat pan to medium low, add olive oil to the pan then add whisked eggs. Scramble eggs into small pieces.

6. Add eggs to veggies and then add in cauliflower.

7. Cook until the cauliflower has a soft texture.

8. Spread cauliflower out on a cookie sheet. Drizzle olive oil over the top and sprinkle with salt pepper. Place on the top rack in your preheated oven and cook until just starting to brown. About 5-10 minutes.

9. Mix up and enjoy this amazingness!

Intuitive Eating Update

I’m sorry for the lack of posts recently. I had been posting on my husbands nearly new laptop and of course it stopped working – it’s actually still not fixed – so it’s been harder to get on here these past couple of weeks.

Anyways… I am so loving this intuitive eating. I have managed to eat so many foods I love – like baked goods, the occasional lattes and ice cream- and I’ve managed to lose a few ounces shy of 10 pounds. I started this thing at 169 pounds and I’m down in the 159s now! Woo hoo!

Since I can and do eat whatever sounds good I have a yummy recipe I tried out last night….wait for it…

20140916-141129.jpg

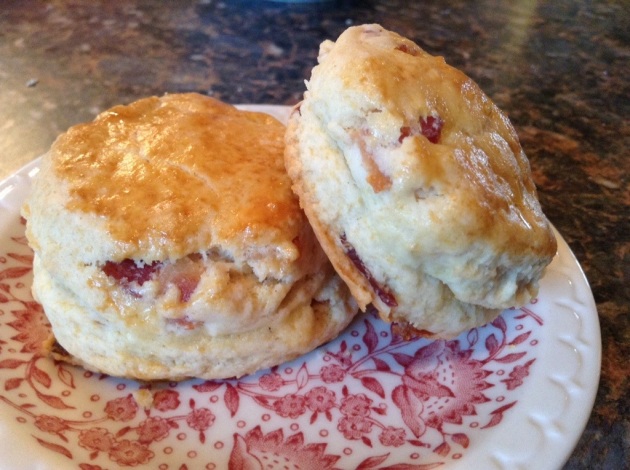
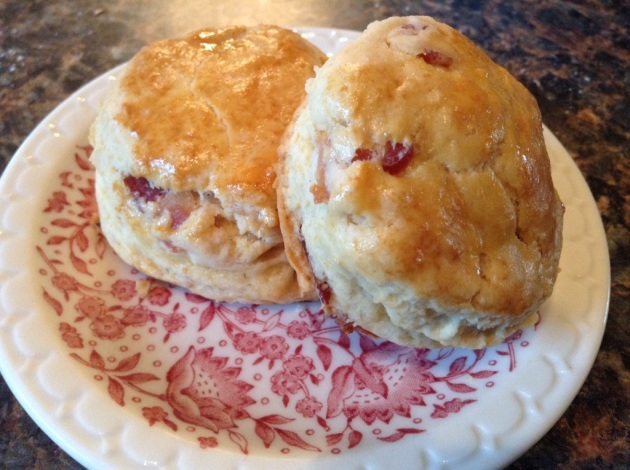
Maple Bacon Biscuits
Adapted from Wineimbiber

10 slices bacon into 1/2–inch pieces (I used the pre-cooked bacon from Costco)
1-3/4 cups flour
1 tablespoons sugar
1-1/2 tsp. baking powder
1/4 teaspoon baking soda
1/4 + 1/8 teaspoon salt
1 stick butter, cut into 1/2–inch cubes
3 Tbs. maple syrup
1/4 cup + 3 tbs. buttermilk
1 egg
1/2 tablespoon half and half or heavy cream
Salt
Additional maple syrup to drizzle over the tops

In a medium frying pan, cook the bacon over medium heat until cooked but not crispy, 10 to 12 minutes, stirring frequently. Remove the bacon to a paper towel–lined plate or pan, to remove excess fat. Or you can use pre-cooked Costco bacon and skip this step all together.

In a large bowl, whisk together the flour, sugar, baking powder, baking soda and salt. Using a pastry cutter or fork, cut in the diced butter, until it resembles small peas. Stir in the bacon, then 3 tablespoons of maple syrup and the buttermilk until the dough just comes together (it will still be clumpy). Be careful not to overwork the dough.
On a lightly floured surface, gently press or roll the dough to 1–inch thickness. Cut the biscuits using a 2–inch round cutter; you should have 12 biscuits. Place biscuits on a parchment–lined baking sheet, spaced 2 inches apart. Chill biscuits in freezer for 10 minutes (or fridge if you don’t have freezer space).

Heat the oven to 350 degrees. While the biscuits are chilling, prepare the egg wash: In a small bowl, whisk together the egg and cream. Brush the chilled biscuits with egg wash and top each with a pinch of salt.
Bake the biscuits until they just begin to brown, about 25 minutes. Remove the tray from the oven. Quickly drizzle about 1 tsp. of maple syrup over each of the biscuits, then place the tray back in the oven for 3 minutes more. Serve while still warm. You can reheat them in the microwave for 20 seconds too and they are delicious!

20140916-141206.jpg

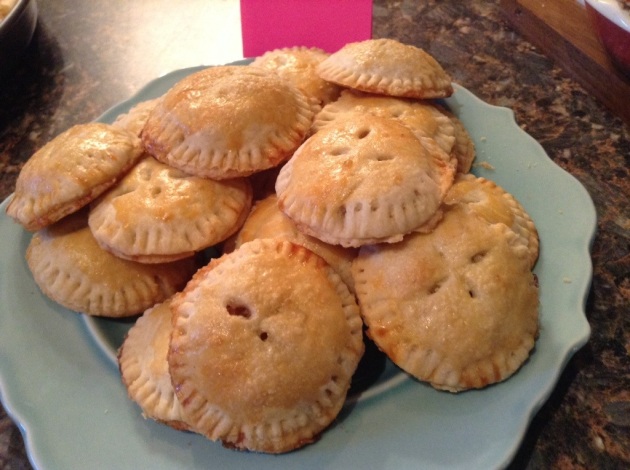
September GNCO – Apple Pie Cookies

For the month of September our game night cook off “special ingredient” was crust – anything you considered crust. The winner of the night was a beautiful chicken pot pie. I followed in second and third with Chicken, Bacon Broccoli Quiche and Apple Pie Cookies.

With two little munchkins to attend to the Apple Pie Cookies initially felt like a big hassle but in the end they were so worth it! It is definitely the season for baking apple things!

20140916-124302.jpg

Apple Pie Cookies
Adapted from Smitten Kitchen
Crust Recipe
2 1/2 cups all-purpose flour, plus more for dusting surfaces, dipping fork
2 tablespoons granulated sugar
1 teaspoon salt
2 sticks unsalted butter, very cold
1/2 cup water, very cold (I pour 1 cup and add ice while I work, then measure 1/2 cup from it when I need it)

Filling
2 medium apples, I used Granny Smith
Squeeze of lemon juice (optional)
1/3 cup granulated sugar
1 teaspoon ground cinnamon
A dash of nutmeg and/or any other spices you like with your apples

To finish
1 large egg
Coarse or granulated sugar for garnish

Additional stuff
2 baking sheets covered with parchment paper
Rolling pin, pastry brush (for egg wash), fork (for crimping and dipping) and sharp knife (to make slits)
A cookie cutter about 2-1/2 inch in size.

Make your pie dough first: Mix together flour, sugar and salt in the bottom of a large bowl. Using a pastry blender work the butter into the flour until the biggest pieces of butter are the size of small peas. Stir in the ice water with a rubber spatula, mixing it until a craggy mass forms. Knead it two or three times to form a ball. Divide dough in half. Wrap each half in plastic wrap and flatten a bit, like a disc. Chill in fridge for at least an hour or up to two days.

On a well-floured counter or pastry cloth, roll out your pie dough thin, a little less than 1/8-inch thick. Lift and rotate your dough as you roll it, to ensure that it rolls out evenly and so you can be sure it’s not sticking in any place. Use your cookie cutter to cut as many rounds as you can from the dough. Transfer them to parchment-lined baking sheets and keep them in the fridge until you need them. Once you’ve finished the first packet, repeat the process with the second packet of dough

Prepare your apples: Peel your apples. Cut thin (1/8-inch thick) slices from each side of the whole apple until the core is all thats left. Cut the apple slices into small cube-like pieces. Place them in your second bowl, covering them with a few drops of lemon juice to keep them from browning. Combine the sugar, cinnamon and nutmeg in a small bowl and add to the apples. Mix together until all apples are coated with the sugar mixture.

Preheat oven to 350 degrees.

Assembly:
Grab your first disc of chilled dough and lightly dampen it on one side with the water. This is to help it seal. Place about 1 tbsp. (as much as you can fit without the dough tearing and still be able to crimp the edges) in the center of the dough. Lightly flatten. Place a second disc of dough on top; I found it easiest to seal it by picking the whole thing up (this is when you’ll be glad that your dough is cold and semi-firm; if it’s soft and getting sticky, chill it until it’s easy to pick up) and press the tops and bottoms around the apple with your fingers. Hold the pies at an angle and place one edge of pie on floured surface. Rotate pie as you crimp around the edges with a floured fork. Place on cookie sheet. Use a sharp knife to cut decorative slits in your “pies”. Brush your cookie with the egg wash and sprinkle with sugar.

Bake your apple pie cookies for 25 minutes, or until puffed and bronzed and very pie-like. (If this is your first batch, peer in at them at 20 minutes, to make sure your oven doesn’t run hot.) Let cool if you have enough patience!

Do ahead: These will keep for a few days at room temperature. You can freeze them by doing everything but brushing on the egg wash and sugar. Keep them frozen until needed. Bake them directly from the freezer just adding on a few minutes to the bake time.

Creamy Garlic Parmesan Hashbrowns

photo 5

This was a new recipe I have been wanting to try for a while and finally got around to making… only I changed it up a bit since I only had hashbrowns on hand. It was delicious and a nice change from ketchup!

Creamy Garlic Parmesan Hashbrowns

(Adapted from Rock Recipes)

  • 3 Cups Hashbrowns
  • 1/8 cup olive oil
  • 2 garlic cloves
  • 1/8 cup butter (not margarine)
  • salt and pepper to season
  • 3-4 slices bacon ( I used turkey bacon)
  • 1/2 cup whipping cream
  • 1/4 cup fresh grated Parmesan cheese
  • Garnish with green onions (optional)

Instructions

  1. Cut the bacon into small pieces, cook until crisp.
  2. Drain off all the fat and set aside.
  3. Press down on the garlic cloves with the side of a knife to break them up a little. Melt the olive oil, butter and garlic together over medium heat in a small pan for about 10 minutes so the garlic is infused into the oil butter mix.
  4. Add most of the oil to the skillet and leave the rest in the small pan.Add the hashbrowns to the skillet. Cook until browned and season with salt and pepper to taste. The potatoes should be fully cooked and a little crispy.
  5. While potatoes are cooking add whipping cream to the small pan with the reserved oil. Let simmer until reduced by about half. Add the Parmesan cheese and stir until melted. 
  6. Once hashbrowns are done cooking add the sauce and the bacon. Garnish with green onions if desired. 

Day 10 of Intuitive Eating

This morning, since my husband has 3 day weekends, I thought I’d make a yummier breakfast since he was home. Creamy Garlic Parmesan Hashbrowns to be precise, with a toasted sourdough English muffin.

This is what I planned on eating:  

photo 1

And then I was FULL so I didn’t eat this: 


photo 2

After a little bit of yard saling – I got a nice selection of mystery books – I had chili and Frito leftovers.


photo 3

For dinner I wanted to use up the rest of the chili and combined it with some noodles and as you can guess it was… gross! Go me! Thankfully I was able to end my night with another slice of raspberry cream pie and ice cream. My husband dished me up and gave me more than I needed and I actually STOPPED! I STOPPED! That’s just plain crazy when me and dessert get together! 

photo 4 

Day 9 of Intuitive Eating

In the book, “How to Have Your Cake and Your Skinny Jeans Too” the author recommends not weighing yourself. Since the body changes weight constantly it can be discouraging if it seems like you are making no progress. She suggests using clothes, about a size smaller, as a way to determine if you are losing weight or not. Every time you want to step on the scale to check your progress instead you can try on your too small clothes and gradually you will see the changes in your body.

I have a pair of capris I chose as my weight loss determiner. I had bought them at a yard sale 3 or 4 weeks ago and couldn’t even button them. After a couple days of eating intuitively I could! They don’t look attractive (yet!) but it was encouraging. As fun as this is I did cheat this morning and step on the scale. In these 9 days I have lost 4.5 pounds! I’m sure some was water weight but what is awesome is I have been eating whatever I wanted when I was hungry and still lost some poundage. At different times throughout the past week I’ve had lemon chicken pasta alfredo, coconut-lemon cake, Schwan’s ice cream almost every evening, raspberry cream pie, muffins, a latte, coffee with creamer, burritos, tacos, hot dogs, bagels.. and the list goes on. How awesome does it feel to know I’ve lost 4.5 lbs. while enjoying foods that I love and knowing I am capable of eating them intuitively – I actually stop when I’m hungry and as of today actually threw the rest of my meal away when I felt full. It feels great! 

This morning I started my day off with an Egg McBagel (egg, turkey bacon and cheddar cheese on a delicious, soft, potato bagel from Costco) and some watermelon. Yum! I ate the watermelon and half of the bagel because I was full. Since it would keep OK I set it aside and when I was hungry later I ate it as a snack.

Egg McBagel

Egg McBagel

For lunch I ate the last of the Tilapia Fish Taco with Spicy Coleslaw stuff I had. Mmmm…Fish Taco

For a snack I had a small cup of decaf coffee with vanilla creamer and a macadamia nut caramel cluster (normally I could have eaten like 10 of these!). I had planned on making a shrimp Alfredo tonight but my husband wasn’t hungry so I popped open a can of Nalley’s Chili and ate it over Fritos with cottage cheese, cheddar cheese and sour cream. What can I say?… that’s the way I like it and since I CAN eat it that way I will.. hehe. 

Chili

There is something about this chili and chip combination I love and yet somehow, in 9 days, I was able to know my hunger and stop when I was full… I know it’s not a lot but for me it is. I actually threw this away. Go me! 

Leftovers

And for dessert I am enjoying, once again, a delicious slice of Raspberry Cream Pie with Schwan’s Raspberry Rumble ice cream. An excellent combination! 

raspberry pie

Raspberry Cream Pie

photo 1

This is a pie I’ve been wanting to try for a long time but because I was trying to be “healthy” I hadn’t made. Now that I can, it is currently waiting in the fridge for me! 

Raspberry Cream Pie

(Adapted from Common Sense Homesteading)

Ingredients

  • 1 – 9 inch pie crust, unbaked 
  • 4 cups raspberries
  • 2/3 cup sugar
  • 4 tablespoons flour
  • 1/4 teaspoon salt
  • 1/2 teaspoon cinnamon
  • 1/2 teaspoon vanilla
  • 1 cup heavy cream
  • 1 egg

Directions

Lay crust into pie pan and crimp edges. Place berries over bottom of crust. Combine remaining ingredients in bowl, mixing until blended. Pour over berries. Cover edge of crust during baking (to keep it from browning too much).  (A pie crust shield makes this quick and easy, but you can also use foil.)  Bake at 400 degrees for about 50 minutes, until center is bubbling and edges are starting to set.  Pie sets up as it cools.  Keep refrigerated.  Can eat “as is” or with a bit of whipped cream or ice cream. 

SAM_3369

Making Changes

Eating intuitively seems like such common sense but in my real world I’ve spent my entire life over eating and eating when I wasn’t hungry. There is something about dieting, telling yourself you can’t eat certain foods, that suddenly makes you crazy for food. When I would tell myself… you can’t have that donut… it was like 20 times harder not to eat it. 

Allowing yourself to eat ANYTHING and learning your hunger cues is so exciting! Food no longer feels like it has a hold on me since I can eat whenever and whatever I want. At the end of the day it’s not so much, “how much did I eat today?” but more like “how much DIDN’T I eat today?” I am having so much fun starting this journey and I can already see some positive results. 

Today I started my morning with a high fiber pancake with maple syrup and a slice of turkey bacon. Normally I would probably eat 2 of each and still feel a little deprived (or at least think I’m deprived). Around 10:30 I drank half a cup of coffee with some creamer because I was sooo tired! For lunch I had one Tilapia Fish Taco with Spicy Coleslaw. Then for dinner I ate half a grilled cheese sandwich on sourdough with tomato soup, roasted asparagus and watermelon. I didn’t even finish my soup because I felt good. And for dessert I enjoyed a slice of Raspberry Cream Pie with a scoop of Schwan’s Raspberry Rumble ice cream. A great way to end the day! 

photo

Tilapia Fish Tacos with Spicy Coleslaw

Today was one of those days as a parent where I think, “how do I survive on so little sleep?” and “why does my 2 year old need to get up at 6am?” I get my 2 year old down for his nap and then my 3 month old thinks it’s time to play. If only they would sleep at the same time so I could do the same! With my lack of energy today I was thankful for some leftovers from dinner last night to keep me fueled for the day.

Fish Taco Final

Tilapia Fish Tacos with Spicy Coleslaw

(adapted from Tyler Florence)

Spicy Slaw:

1 head green cabbage, shredded

2 carrots, grated

2 green onions, chopped

1 red chile, sliced

11/2 cups mayonnaise

1/4 cup Creole mustard

1 tablespoon cider vinegar

1 lemon OR lime, juiced

Pinch sugar

1/2 teaspoon celery seed

Several dashes hot sauce

Kosher salt and freshly ground black pepper

Combine the cabbage, carrot, green onions, and chile in a large bowl.

In another bowl, mix the mayonnaise, mustard, vinegar, lemon juice (or lime), and sugar; stirring to incorporate. Pour the dressing over the cabbage mixture and toss gently to mix. Season the coleslaw with celery seed, hot sauce, salt, and pepper. Chill for 2 hours.

Tilapia Prep:

(From Home Cooking Memories)

Preheat Oven to 400 degrees F.

2 pounds tilapia fillets, fresh or frozen that have been thawed

1 lime or lime juice

Salt & Pepper

Seasoning (see below) or your favorite seasoning

Corn tortillas or flour tortillas. I personally love the pre-made tortillas at Costco that you cook up yourself. So fresh and tasty!

Optional toppings: shredded cheddar cheese, sour cream, avocado, guacamole, lime wedges, cilantro

For Seasoning:
  • 1/2 teaspoon garlic powder
  • 1 teaspoon chili powder
  • 1 teaspoon cumin
  • 1/2 teaspoon dried oregano
  • Pinch of cayenne pepper or paprika

Instructions

  1. To make seasoning: Mix together all seasonings and set aside.
  2. Preheat oven to 400 degrees F. Place tilapia fish fillets on a greased baking sheet or a glass dish , and squeeze lime juice over them. Season with salt and pepper. Sprinkle lightly with seasoning. Bake for 15 minutes or until fish is done (flakes easily with a fork).
  3. While fish is baking, prepare toppings and heat tortillas.
  4. To assemble tacos: place desired amount of fish, broken up slightly, lengthwise in the middle of your tortilla. Depending on the size of your fillet, each one can usually make about 2 tacos. Top fish with spicy coleslaw and cheddar cheese, a squeeze of lime juice and a couple squirts of Tabasco sauce if you like spicy… or any other toppings you think sound good.